Practice Automations - Inbound Message
- Get Started
- Automations
- Patient Channel
- Patient Facesheet
- Collaborative Inbox
- Lines & Resources Requests
- Lines, Events, Resources
- Analytics
- Platform Settings and Configuration
- Users and Groups
- Campaigns
- SMS Basics
- Troubleshooting and FAQ
- Conversation Builder
- Add-Ons
- Release Notes
- Technical Specifications
- Referrals
- Self-Rescheduling
- Recalls
- Marketplace
Table of Contents
Configure Default AutomationStart AutomationsManaging AutomationsEditing a Practice AutomationCreating Automations From TemplateAppointment Automations are generally created at the Enterprise and configured for each Practice within the Practice Automation section. This allows you to leverage already built sets of keywords creating efficiency and standardization of actions triggered by the keywords.
Automations can also be created just at the Practice, typically when a specific Inbound Message workflow is needed. These Automations will only be available for use within the Practice they are created in.
Page Overview
Inbound Message Automations are collected at the end of the Automations page. Additionally, Automations in grey are Default Automations, Automations in white are Practice Automations.
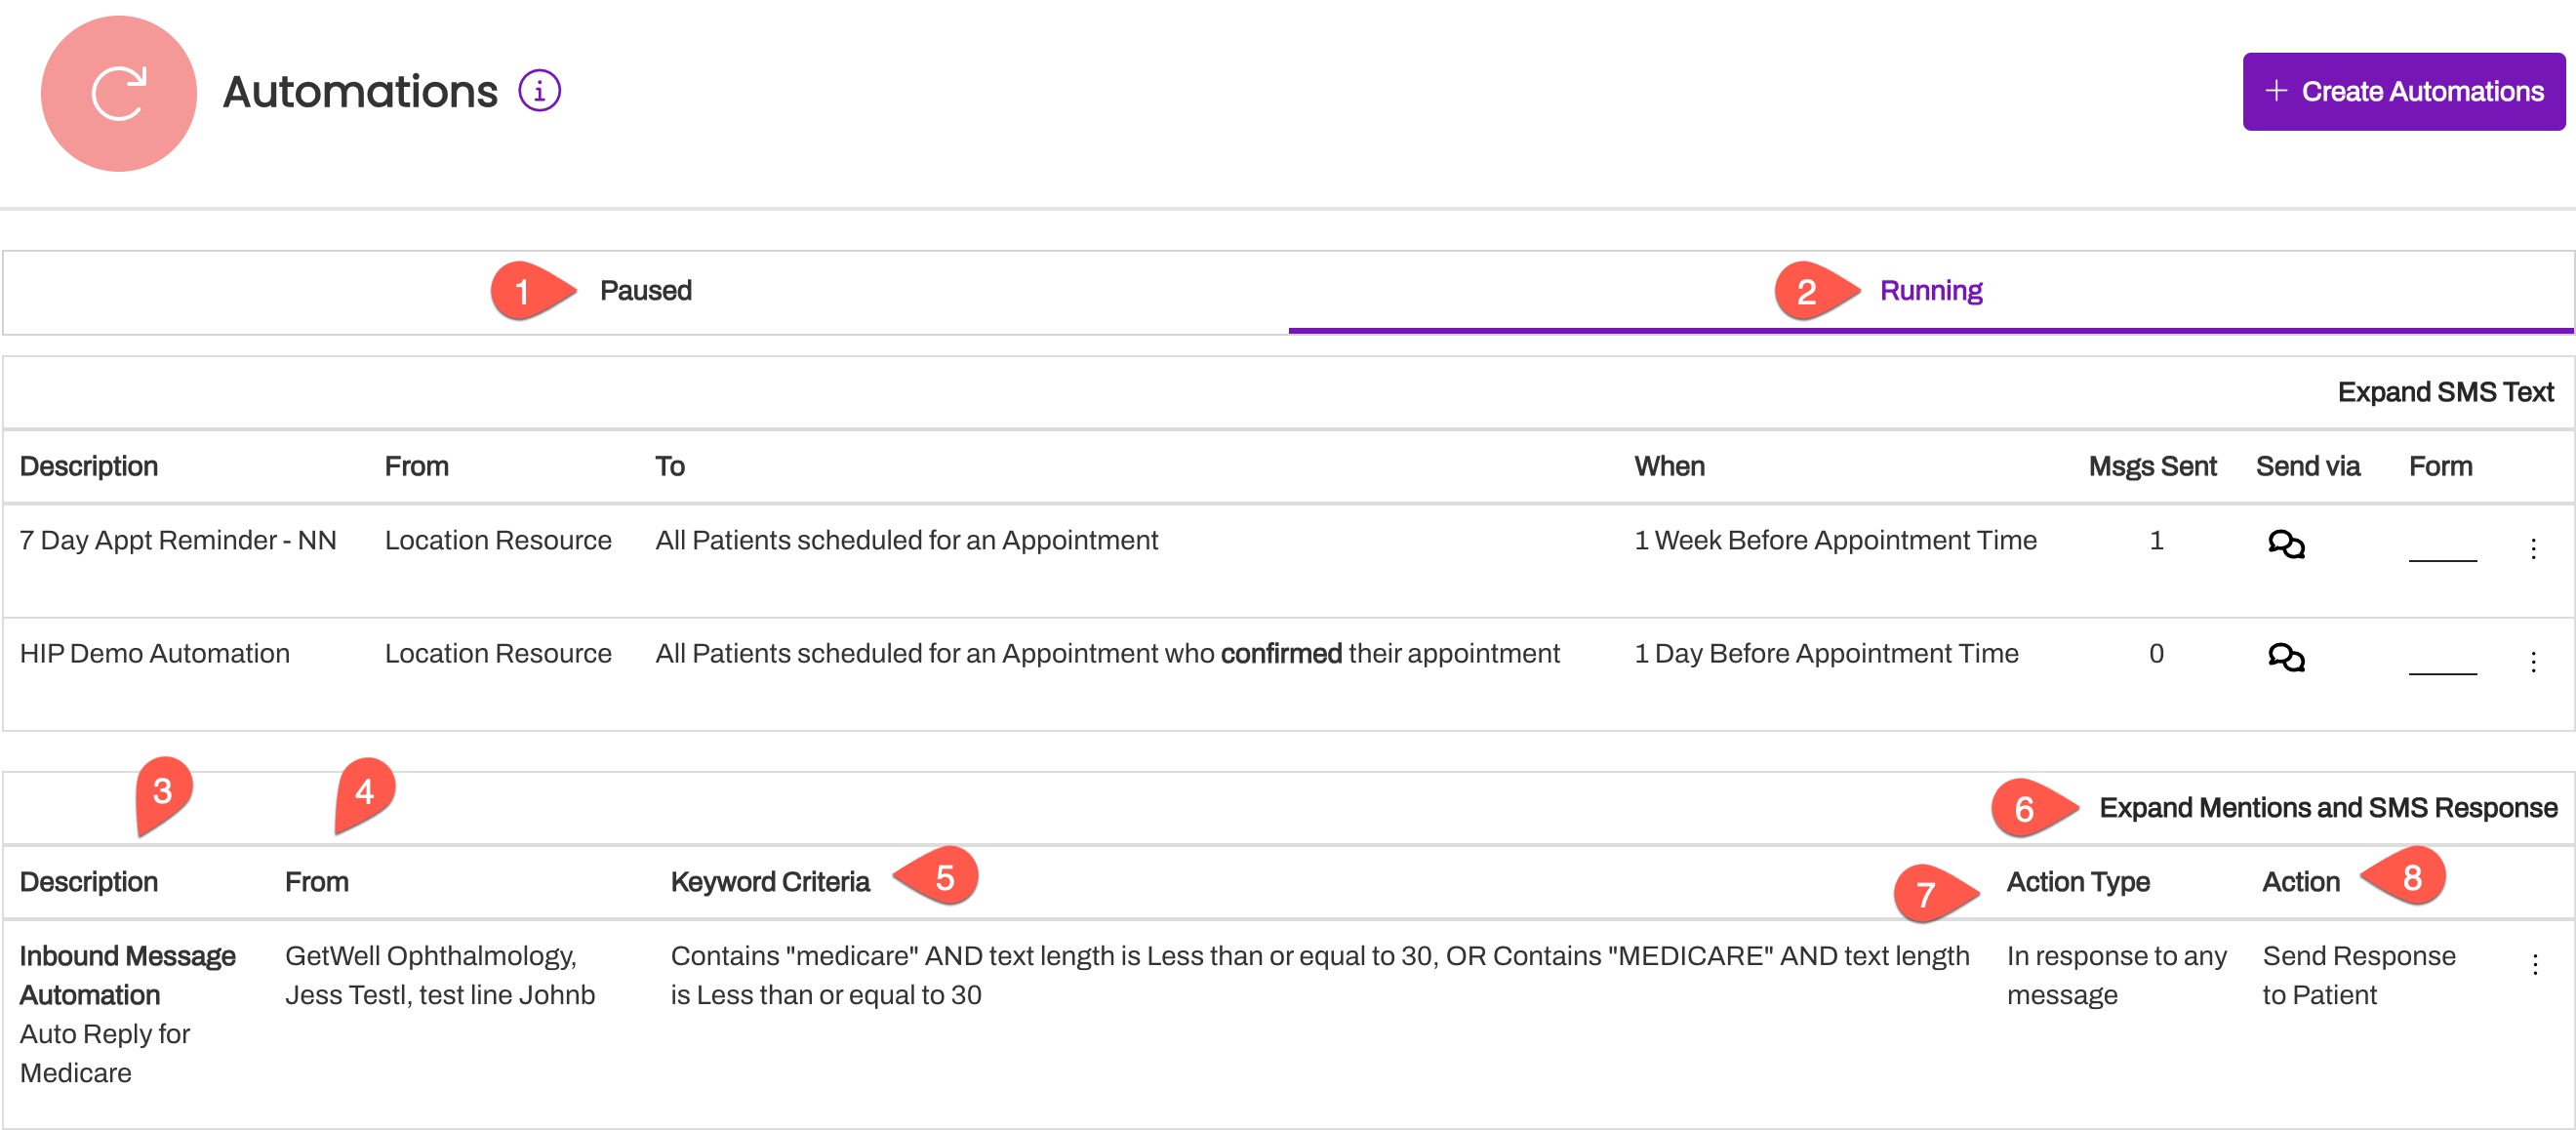
- Paused: This tab contains all Default Automations that have not been configured and all Practice and Default Automations that have not been started or that have been paused.
- Running: This tab contains all active Automations for the Practice.
- Description: This field displays the Inbound Message Automation and the related title of the Automation, which is established during the Automatin's configuration.
- From: The names of the Lines set up with this Automation.
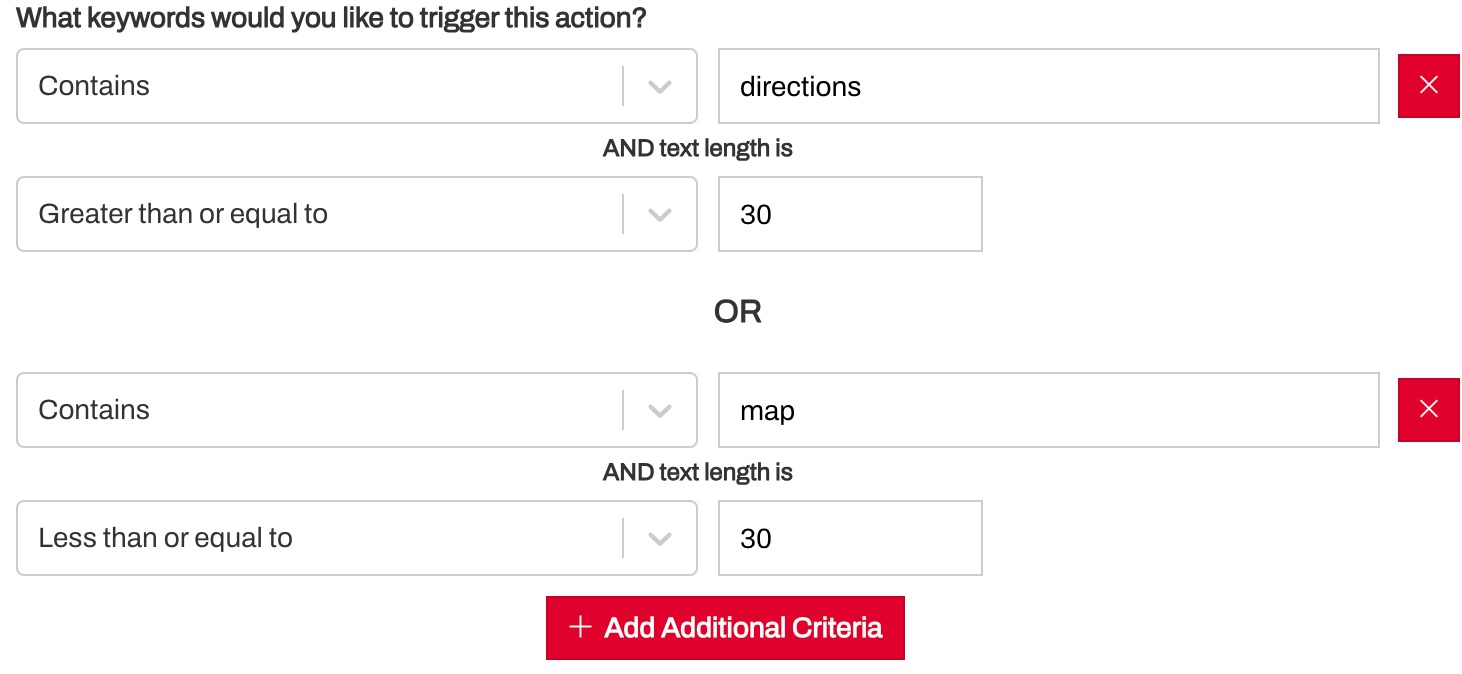
- Keyword Criteria: This is a list of all words and phrases set up as keywords, including how the keyword is configured (i.e. exact match or contains and text length limits). These items will trigger the Automation Action when received from the patient.
- Expand Mentions and SMS Responses: Select this link to view the mentioned individual/group and related message when the action is Create Mention or SMS messages set up to send when the Action is Send Response to Patient.
- Action Type: This identifies whether the keyword needs to be received in response to a confirmation message (in response to confirmation) or not (in response to any message).
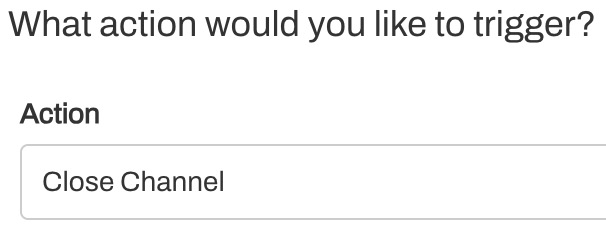
- Action: This indicates the associated Action that the keyword sent in by the patient will trigger.
Configure Default Automation
This section focuses on configuring Default Automations for the Practice. Click here to learn how to build a Default Appointment Automation.
- Navigate to Practice Settings > Automations.
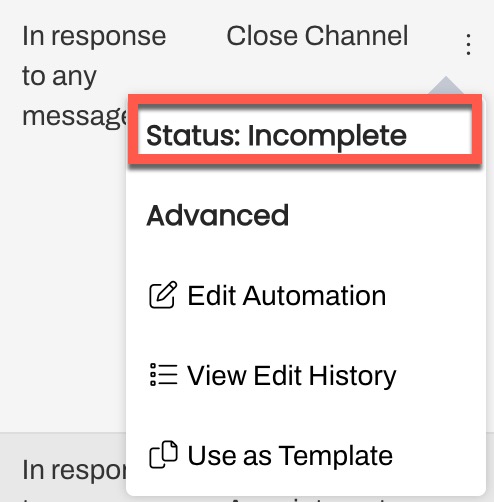
- Open the Paused tab.
-
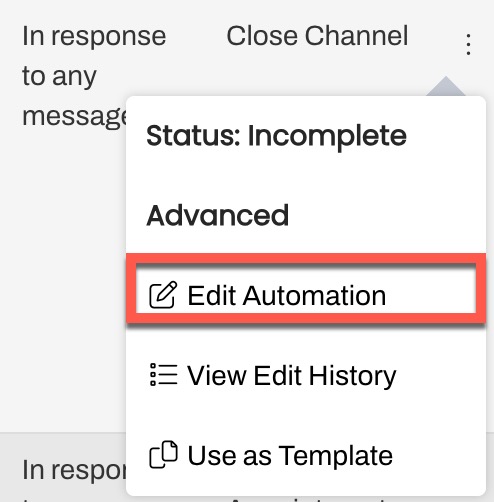
Click the (...) menu for the Automation you want to enable. You will notice that the Automation has a status of Incomplete. Until the Automation has been configured, you will not be able to start it.
-
Click Edit Automation.
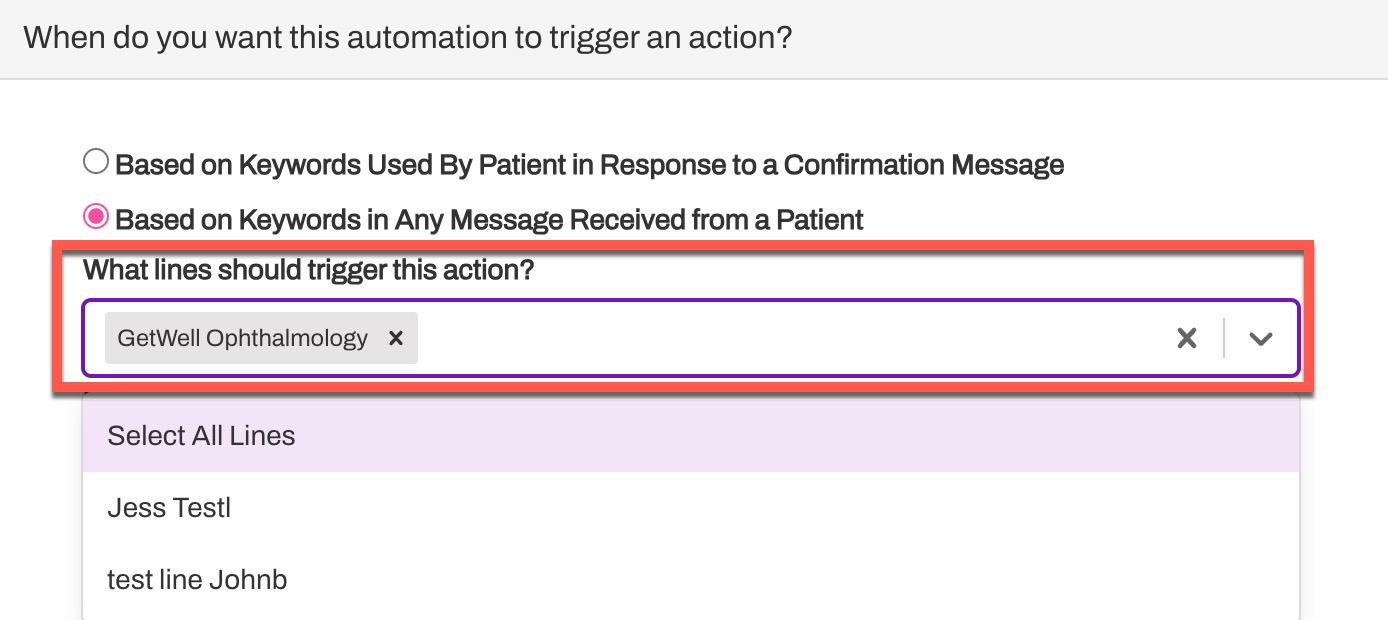
Choose Lines
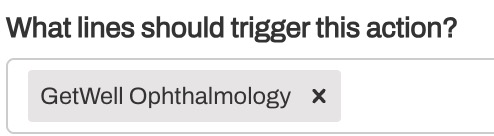
From When do you want this automation to trigger an action?, use the drop-down menu to select the Lines that should use this Inbound Message Automation.
Complete Setup
Depending on which Action you have chosen, you may have additional setup steps.
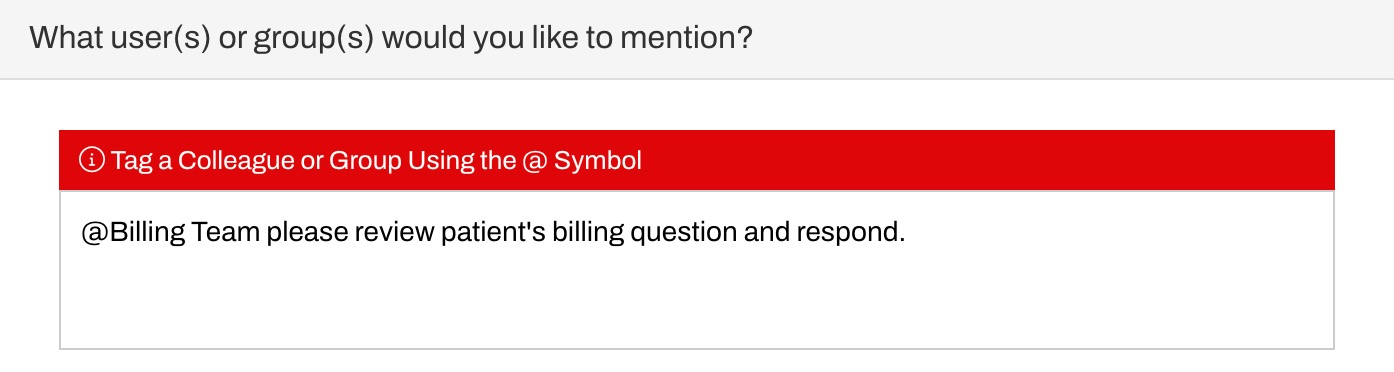
Create a Mention
Complete the What user(s) or group(s) would you like to mention? section. Here you will add the desired User or User Groups using the @groupname or @username. Then, you will need to include the custom message that will be sent to that User or User Group.
Send Response to Patient
While the message and send hours are established at the Default, you can attach media files in the What should the automation say? section. This includes campus maps, PDF files with instructions, and more. We recommend all attached media is under 500KB in size to preserve performance.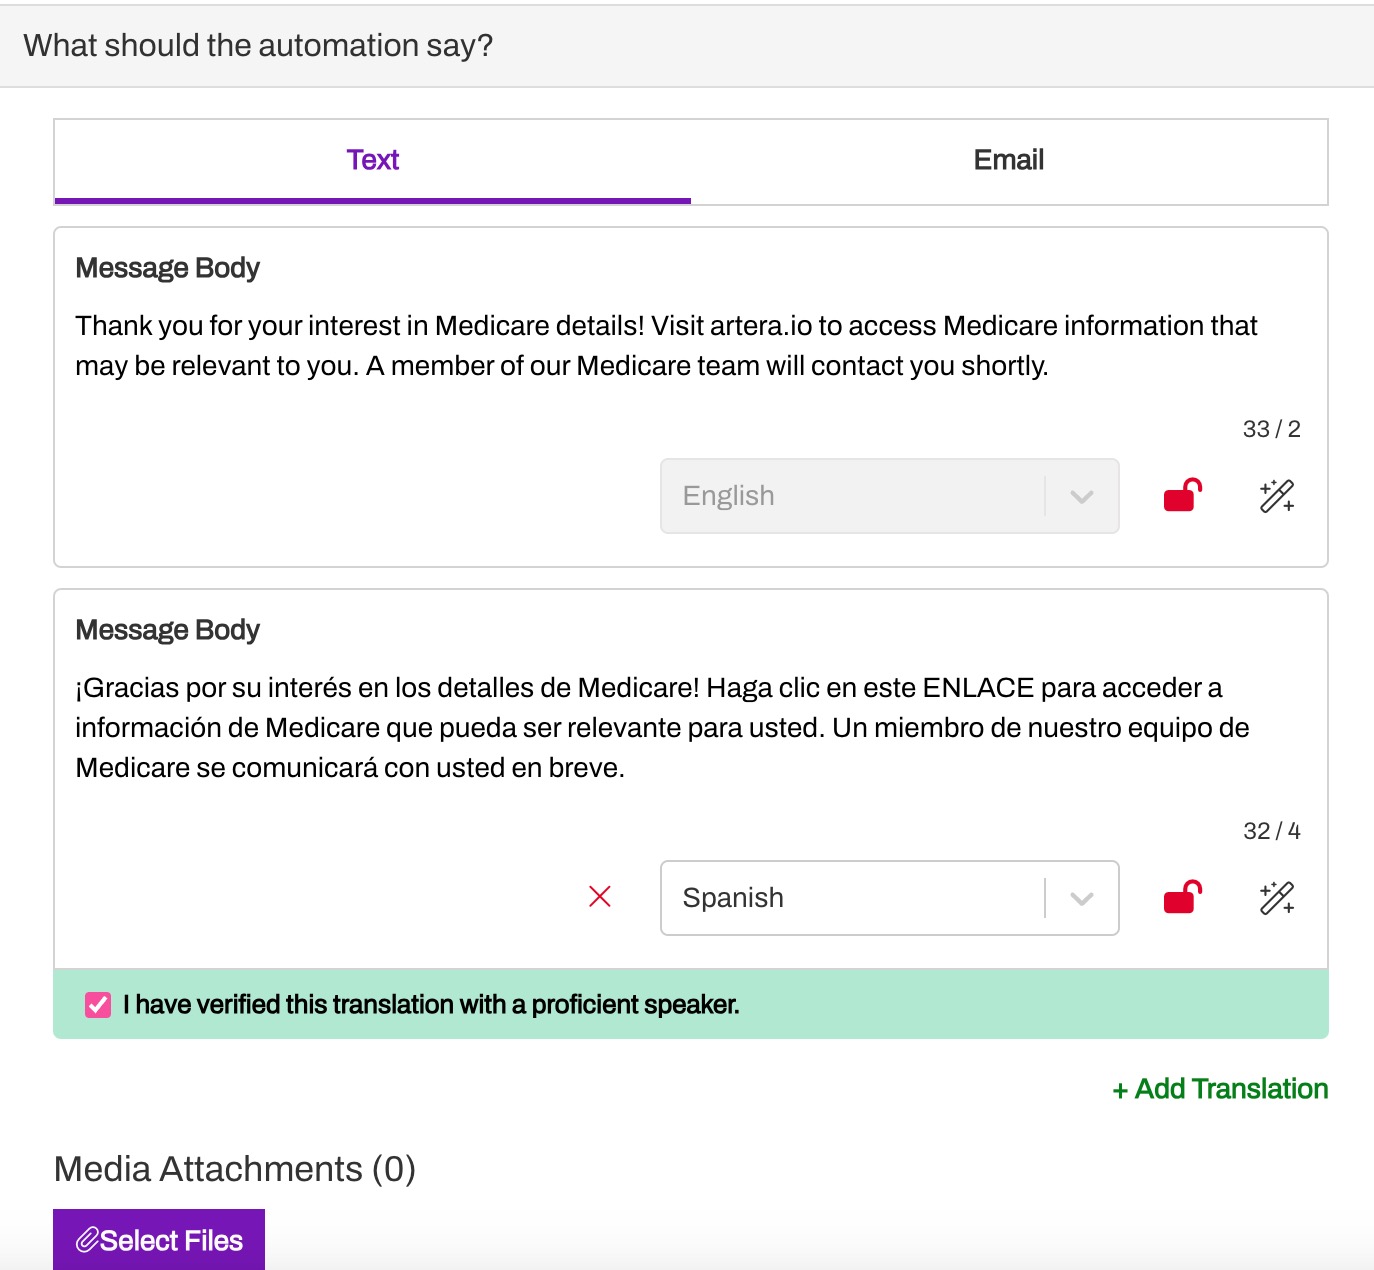
Appointment and Channel Actions
These Actions do not require additional setup steps at the Practice-level.
Create Practice-specific Automation
- Navigate to Practice Settings > Automations.
- Click + Create Automation.
-
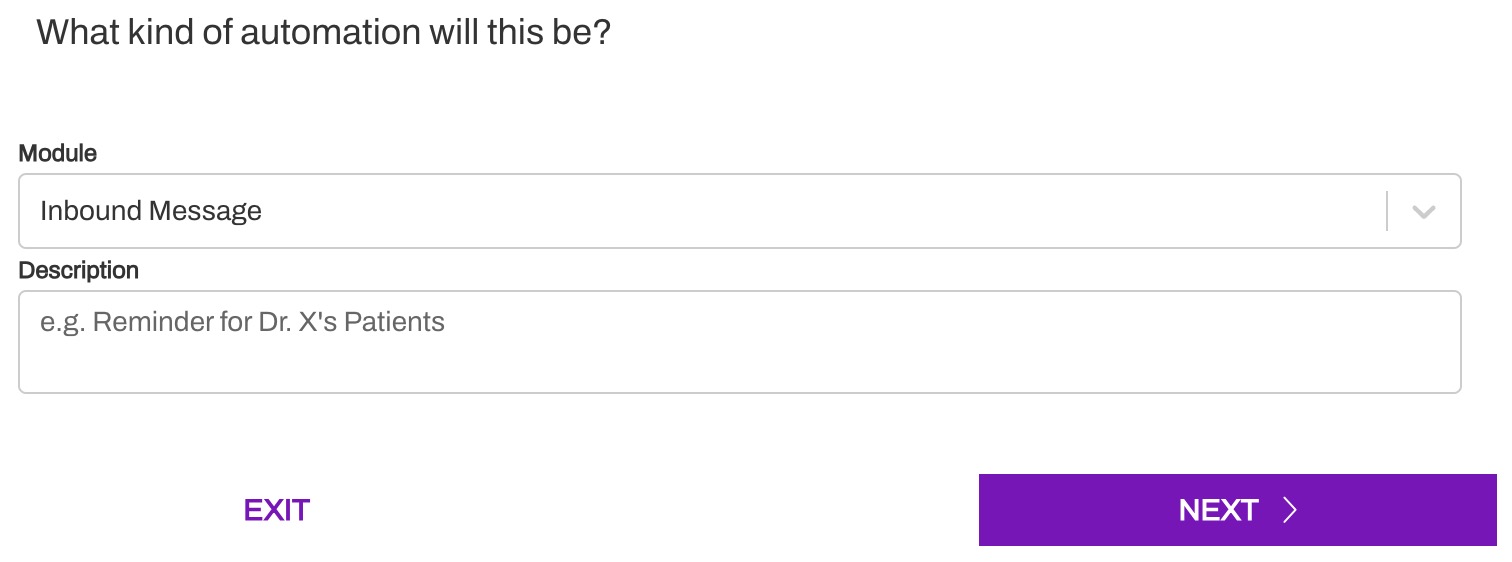
Select Inbound Message from the Module drop-down, and add a short Description. This is how you will identify the Automation going forward so use consistent naming conventions.
-
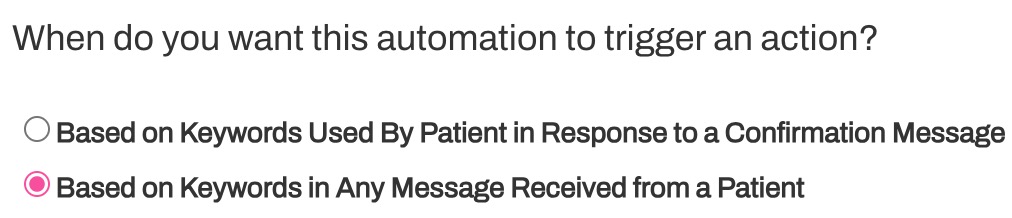
Use the radio button to select the type of message that will trigger the Automation to send.
-
Based on Keywords Used By Patient in Response to a Confirmation Message: This option allows the Automation to trigger only if a patient responds to a message that contains one of the following Smart Phrases:
- {eventConfirmText}
- {eventConfirmLink}
- Based on Keywords in Any Message Received from a Patient: This is a broader option that will trigger the Automation based on any patient inbound message that matches a keyword configured as part of the Automation itself.
-
Based on Keywords Used By Patient in Response to a Confirmation Message: This option allows the Automation to trigger only if a patient responds to a message that contains one of the following Smart Phrases:
-
Select the Lines that should use this Automation.
-
Enter your keywords and parameters. Use + Add Additional Criteria to include additional keywords. Click here for recommended configuration.
-
Next, choose an Action from the drop-down. For a complete list of Actions and their uses, click here.
-
Complete any additional sections required for the various Actions.
- Create Mention: Tag the user or User Group and include a message.
- Send Patient a Response: Choose the Automations active hours and craft a message to the patient.
- Review your Automation. Click Create Automation to save.
Start Automations
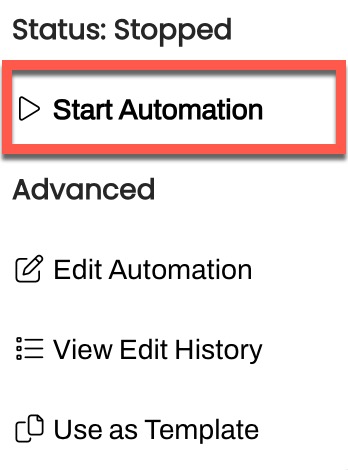
When the Automation setup is complete, the Automation is automatically Paused, meaning the Automation is not acrive. To enable the automation, navigate to the Paused tab on the Automations page, click on the Automation's (...) menu and select Start Automation. The Automation will then move to the Running tab.
Managing Automations
It is important to have an Automation strategy to ensure that your Automations stay up to date over time. Click here to learn more.
Editing a Practice Automation
- Navigate to Practice Settings > Automations.
- Select the automation you wish to edit by clicking (...) menu and choosing Edit Automation.
- Select Update when done to save your changes.
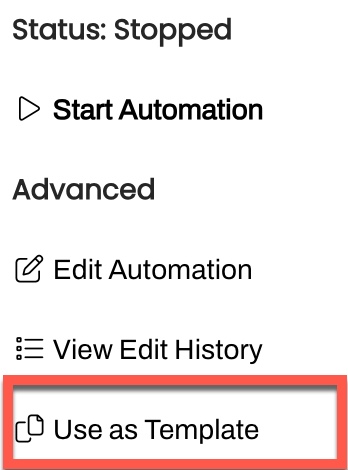
Creating Automations From Template
You can use Default or Practice Automations as Templates, allowing you to quickly create new Automations. This is especially helpful when creating multiple actions for the same set of keywords.
-
Navigate to the (...) Action Menu of the Automation you would like to copy and select Use as Template.
- Edit the appropriate sections.
- Review the completed Automation and click Create Automation.