Send a Community Outreach Campaign
- Get Started
- Automations
- Patient Channel
- Patient Facesheet
- Collaborative Inbox
- Lines & Resources Requests
- Lines, Events, Resources
- Analytics
- Platform Settings and Configuration
- Users and Groups
- Campaigns
- SMS Basics
- Troubleshooting and FAQ
- Conversation Builder
- Add-Ons
- Release Notes
- Technical Specifications
- Referrals
- Self-Rescheduling
- Recalls
- Marketplace
Table of Contents
Add Member List to SFTPBuild CampaignCampaign MessageWhat time of the day would you like the Campaign to send?Final ReviewInvalid RowsEnabling CampaignsLet’s review how to create a Campaign to reach your new member list.
Add Member List to SFTP
Each time you receive a new member list and add it to the SFTP exchange folder set up during implementation, be sure to use the same member list format as previous files. Based on the SFTP exchange cadence (typically once per day), Artera will pull the list of members into your Community Outreach Enterprise. You can only create and send the Campaign once that list has been ingested.
How do I know if the list of new members has been added to Artera?
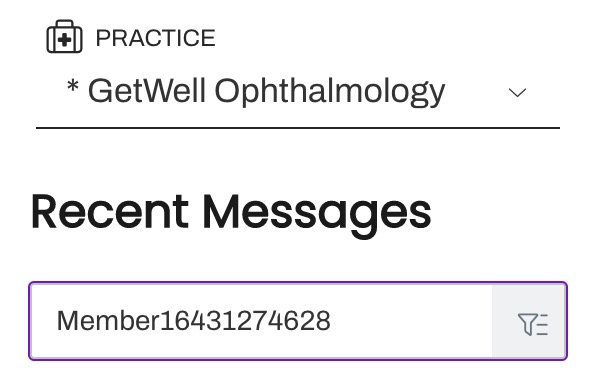
The simplest way to determine if the new members have been populated in your Community Outreach Enterprise is to search for a member (or two) from the new list using the unique Member ID. If you locate the member, you are ready to send the Campaign.
Build Campaign
Let’s review how create your Community Outreach Campaign for your member lists.
- Navigate to Settings > Practice Settings > Campaigns.
- Click + Create Campaign in the upper-right corner.
- Enter a Description for the Campaign. This description is not patient-facing.
-
Next, you will need to upload the list of members who will be sent this Campaign. Start by clicking on the blank box to open the File Selector. Remember, the Member List must have been added to the SFTP folder and ingested into Artera before you can upload the list.
- Upload a .csv file only containing the unique Member ID from the provided list. Although CSV (comma delimited), CSV (Macintosh), and CSV (MS-DOS) are supported, we highly recommend saving your file as an MS-DOS Comma Separated (.csv) file, if available. This prevents empty rows and decreases the time it takes to upload and digest the file.
- This file must only include a single column of the Unique member IDs in Column A with no header and no additional information.
- After the file has been uploaded, a green box will appear at the top of the page. Click Next.
- Upload a .csv file only containing the unique Member ID from the provided list. Although CSV (comma delimited), CSV (Macintosh), and CSV (MS-DOS) are supported, we highly recommend saving your file as an MS-DOS Comma Separated (.csv) file, if available. This prevents empty rows and decreases the time it takes to upload and digest the file.
- Select the Line to associate with this Campaign. Messages will be delivered from your Artera high-volume toll-free number, however, patient responses will be directed to the Line chosen.
Campaign Message
Create your Community Outreach message for each of the desired delivery options (Text, Call, Email). To increase deliverability, we recommend building messages for both Text and Call. You can choose to craft your own Campaign message or use a Quick Response.
Manual Message
-
Use Smart Phrases to personalize the message. {clientFirstNameProperCase} is always a good option.
- Note: Smart Phrase use is limited within Community Outreach Campaigns, as Event, Referral, and Discharge Smart Phrases cannot be used, and often the mapped data is more limited.
- To prevent your Community Outreach message from being deciphered as spam by recipient phone carriers, you must include opt-out language within your message. A common example of opt-out language is: "Reply STOP to unsubscribe."
- Community Outreach messages should be sent as unsecured (ensure the lock icon is open). Tip: Enter !! before the Campaign message to automatically unlock the message.
- Be sure to add translations to your message if you have mapped Language Preferences as part of your Community Outreach Implementation.
Quick Response
Note: When using Quick Responses with Community Outreach Campaigns, it is important to confirm that you do not include any Event (i.e {eventDate}), Referral, or Discharge Smart Phrases. Use the Smart Phrase wand to identify which Patient and General Smart Phrase are supported by Campaigns.
Message Examples
Preview Phone Call
You can validate how your call message will sound by previewing the phone call. In the sample call, any Smart Phrases will be randomly populated with generic placeholders.
- Click the Phone icon at the bottom of the call message:
- Enter a valid phone number and click Call Me.
- Be sure to say Hello to activate the message delivery.
Campaign Timing
Next, determine when the Campaign should be sent.
Start Now vs. Start Later
Use the radio buttons to select Start Now or Start Later. If you select Start Later, you will be prompted to enter a Start Date and Time.
We recommend choosing Start Later even for Campaigns that you would like to start on the same day. This option simply provides added flexibility in allowing you to pick the Start Date and Time. Campaigns follow your Practice timezone.
What time of the day would you like the Campaign to send?
Depending on the volume and cadence of messages you are looking to send, the Campaign may send over several days. Use the Earliest and Latest times to indicate which hours of the day are okay to send the Campaign message.
For Campaigns where you want patients to engage with you (e.g. text or call to schedule a visit), ensure the volume of responses is manageable for your team. For example, if you have a staggered start and your full staff is only on shift from 10:00 AM-3:00 PM, consider setting Earliest and Latest times based on staff availability.
Please note that Campaigns respect TCPA Hours and therefore, can only be set to send between 8:00 AM - 9:00 PM in your Practice's timezone. If the Campaign's daily start and end times fall outside TCPA mandated hours, the following error message will appear:
Send only on business days?
Use the toggle to choose whether this message should only be sent on Business Days. Business Days are determined by your Practice hours. Any day that your Practice is open for any duration of time counts as a Business Day in Artera.
If you are running a Campaign that asks the patient to engage with you, we recommend toggling this setting to Yes. This ensures that someone will be available to respond to the patient quickly.
How quickly would you like your campaign to send?
Set how many messages you would like to send per hour. This rate can be set using increments of 12 messages per hour, with a maximum rate of 2,496 messages per hour. However, Artera sends an evenly distributed amount of messages every 5 minutes, see table below for more information. Click and drag the slider to change the speed of message delivery; you will notice the text below the slider will update with the chosen rate.
For Campaigns where you anticipate a large number of inbound responses, consider reducing the send rate. This ensures you will have enough staff to engage with the inbound messages without being overwhelmed.
Final Review
Finally, review your Campaign. Artera calculates the 'Patient to Reach' by processing the CSV file you uploaded. You can also review the Campaign send dates/times and message copies. When you are ready, click Create Campaign.
Enabling Campaigns
Once you have saved your Campaign, it will automatically be placed in the Pending tab. To start the Campaign, click the (...) menu and choose Start Campaign. Important: Once you start a Campaign, you cannot edit any of the settings.
Once enabled, the Campaign will move into the Queued tab until the indicated start date and time is reached. If the Campaign runs over multiple days, it will automatically move from the Running to the Paused tab based on the included Start/End times.